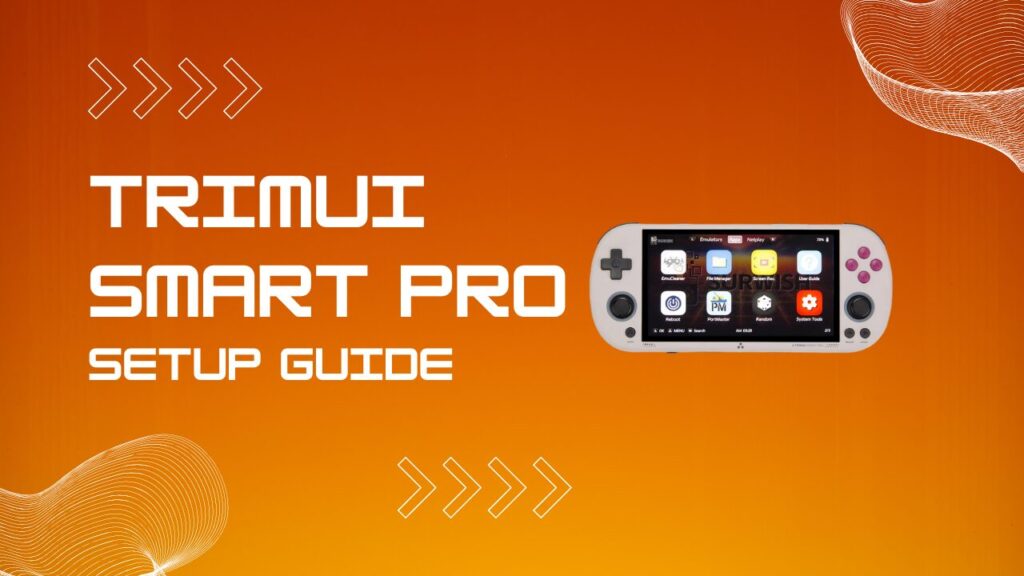
The Trimui Smart Pro setup process looks intimidating the first time, but it follows a logical, repeatable structure once you understand the file hierarchy. This guide walks through every step of a complete Trimui Smart Pro setup, from selecting and formatting an SD card, to installing firmware, placing ROMs and BIOS files correctly, and fixing the most common issues new owners run into.
Key Takeaways
- Format your microSD card as FAT32 before anything else. exFAT and NTFS will not work.
- The firmware file (
trimui_tg5040.awimg) must go in the root of the SD card, not inside any folder.- ROMs go inside the
Romsfolder, sorted into system-specific subfolders.- BIOS files usually live at
/RetroArch/.retroarch/system/.- Sega CD requires three separate BIOS files:
bios_CD_E.bin,bios_CD_J.bin, andbios_CD_U.bin.- If ROMs are not showing, use the Refresh ROMs option from the device menu.
- The 1.0.4 “no SD card” error is usually a formatting, partition, or file-placement issue.
- CrossMix OS is the best community upgrade for improving the stock experience without changing your whole workflow.
- 128GB to 256GB is the sweet spot for SD card size.
- The bundled no-name SD card is fine for testing, but not for trust.
What You Need Before Starting Your Trimui Smart Pro Setup
Getting the right tools in place before touching the device saves a lot of backtracking. You will need a microSD card, a USB card reader, 7-Zip for archive extraction, Rufus for FAT32 formatting on larger cards, the latest firmware package, and the current base package with the folder structure the device expects.
A clean setup is much easier when you treat the SD card like the foundation of the whole build, because that is exactly what it is. If the card is flaky, everything above it starts to look broken, including firmware installs, ROM scanning, save files, and artwork. I have had cards look perfectly normal during a quick copy test, then corrupt halfway through a larger PS1 or PSP transfer, which is why I do not trust a bundled card any farther than I can flick it.
SD Card Size And Format Requirements
The Trimui Smart Pro works best with a branded microSD card formatted as FAT32, and 128GB to 256GB is the practical sweet spot for most people. That size range gives you room for cartridge libraries, a healthy PS1 collection, some PSP, and a bit of experimentation without turning file management into a side hobby.
The part that catches people is not usually capacity, it is card quality and formatting behavior. Cheap cards often report the right size in Windows, then fall apart once you pass their real write limit, and that failure loves to show up right after you have copied a huge ROM set. In my experience, a SanDisk or Samsung card saves more time than any guide ever will.
FAT32 matters more than people expect, because the firmware installer is picky and the launcher behaves better when the card structure is built the way the system expects. Use a 32KB allocation size when you format, keep the card simple, and avoid the temptation to leave it as exFAT just because your PC suggests it.
How To Format And Flash The SD Card
Correct SD card formatting is the foundation of a working Trimui Smart Pro setup, and this is where a lot of new owners lose an hour for no good reason. Windows does not make FAT32 easy on larger cards, so Rufus is still the simplest route for a clean format that the device can actually use.
Once formatted, extract the firmware zip with 7-Zip and locate the .awimg file inside. Extract the base package separately, because you will need its folder structure and core directories on the same card before you start loading games and BIOS files.
- Format the card as FAT32 with a 32KB allocation size.
- Extract the firmware archive and find the
.awimgfile. - Copy the
.awimgfile to the root of the SD card. - Extract the base package.
- Copy the base package contents to the root of the same SD card.
The root directory detail sounds obvious, but it causes a silly number of failed installs. Windows can hide file extensions, which makes it easy to accidentally rename the file into something like trimui_tg5040.awimg.awimg, and the handheld will just ignore it. I have seen a perfectly valid firmware package fail for 20 minutes because the file looked right in Explorer and was wrong underneath.
Flashing The Firmware Step By Step
Firmware installation on the Trimui Smart Pro is triggered by a hardware button combo rather than a menu option. With the prepared SD card inserted, hold Volume Down and Power together for about 3 to 5 seconds until the progress bar appears, then leave the device alone until it finishes and reboots.
A battery-related failure can look exactly like a bad SD card if the handheld is low on charge, so make sure the unit has enough power before you start. I prefer to charge it first, disconnect it, and then flash, because a cheap cable or a weak USB port can introduce just enough weirdness to make the process feel cursed.
If no progress bar appears, work through the boring checks in order instead of changing five things at once. Confirm FAT32, confirm the firmware file is in the root, confirm the file extension is correct, and confirm you are holding the button combo long enough. Most failed flashes are not mysterious, they are just one tiny mistake hiding in plain sight.
How To Add ROMs To Your Trimui Smart Pro
Adding ROMs to the Trimui Smart Pro is straightforward once the card has the correct base package structure. After the firmware and folder set are in place, open the Roms directory on the SD card and drop each game into the correct system folder.
The launcher expects a fairly clean folder structure, and it does not reward creativity. If you bury games too deeply inside extra subfolders, the scan can miss them, or the menu can show an empty library that makes you question your life choices. I usually keep it simple: system folder first, games directly inside it, and only one extra subfolder if the system genuinely needs it.
Common folder mappings to know:
- Mega Drive or Genesis:
MD - Super Nintendo:
SFC - Nintendo Entertainment System:
NESorFC - PlayStation:
PSorPSX - Sega CD:
SCD - PSP:
PSP - Game Boy Advance:
GBA - Neo Geo:
NEOGEO
ROM File Formats And Folder Names
The Trimui Smart Pro handles compressed formats like .zip and .7z well for most cartridge-based systems, which helps keep your card tidy. For disc-based systems, .chd is usually the cleanest option because it reduces clutter, saves space, and avoids the multi-file chaos that comes with loose bin and cue sets.
PSP games usually behave best as .iso or .cso, while PS1 and Sega CD are far less annoying in .chd. The hidden friction here is that a file can be technically present and still invisible or unbootable if the folder depth is wrong, the cue file points to missing bin names, or the archive contains another folder layer you did not notice during extraction. In my experience, a lot of so-called bad ROMs are really naming and path problems wearing a fake mustache.
If a system folder does not exist after copying the base package, you can create it manually, but match the expected folder name exactly. The software stack underneath is Linux-based, so naming mistakes that look harmless on a PC can still break scanning or boot behavior on the device.
How To Add BIOS Files To The Trimui Smart Pro
BIOS setup is the difference between a handheld that mostly runs cartridge systems and one that handles the CD-era library properly. On the Trimui Smart Pro, BIOS files usually belong in:
/RetroArch/.retroarch/system/That .retroarch folder is hidden by default on many computers, which is why people think the path does not exist. On Windows, enable hidden items in File Explorer first. On macOS, be careful not to drag extra metadata files onto the card while you are in there, because stray dotfiles can make a clean folder look messier than it really is.
BIOS File Placement Path
Here is the practical reference list for the BIOS files most people end up needing first:
| System | BIOS File(s) |
|---|---|
| PlayStation 1 | scph5500.bin, scph5501.bin, scph5502.bin |
| Sega CD | bios_CD_E.bin, bios_CD_J.bin, bios_CD_U.bin |
| PC Engine CD | syscard3.pce |
| Game Boy Advance | gba_bios.bin |
| Neo Geo | neogeo.zip, aes.zip |
Neo Geo can be slightly awkward depending on the core and package layout, because some setups expect those files in the BIOS folder at the root while others look through RetroArch paths. If Neo Geo refuses to boot while everything else works, this is one of the first places I check.
Trimui Smart Pro Sega CD BIOS Setup
Sega CD is the system that generates the most setup friction on this handheld, mostly because it looks simple until one tiny filename derails the whole launch process. You need all three region BIOS files present at the same time, bios_CD_U.bin, bios_CD_E.bin, and bios_CD_J.bin, and they belong in the RetroArch system folder.
File naming matters more than people expect here. A capital letter in the wrong spot, a missing underscore, or a doubled file extension is enough to stop booting without giving you a useful error message. I still check Sega CD BIOS files character by character when a game fails to launch, because one uppercase letter can waste an afternoon if you assume the issue is deeper than it really is.
Place Sega CD game files in the SCD folder inside Roms, and use .chd where possible to keep things tidy. If your game still does not launch after the BIOS files are in place, check the filename case, confirm the files are not nested inside another folder, and make sure the game set itself is not the weak link.
Preloaded SD Image Options For The Trimui Smart Pro
A preloaded SD image is a full snapshot of a configured card, which usually includes firmware, folders, themes, RetroArch settings, and sometimes a game library. That can be a huge time saver if you want to skip the repetitive setup steps and get to a working handheld faster.
The catch is that cloning a setup also clones whatever was wrong with it. If the original card had file-system errors, a cramped partition layout, or a bunch of half-broken settings from previous experiments, the clone carries that baggage over like an unwanted souvenir. I like cloning for migrations, but I prefer a fresh build when I want to remove doubt from the process.
Clone Vs. Fresh Build
Cloning is the better option when you already have a working card and simply want to move to a larger or more reliable one. Tools like Win32DiskImager or Balena Etcher handle the full image copy well, but you should still check whether the final partition layout actually expands to use the new card size.
A fresh build takes a little longer, but it gives you a clean baseline that is easier to troubleshoot later. CrossMix OS sits in the middle of those two options, because it gives you a polished community setup without forcing you to inherit every oddity from a mystery preloaded card.
Fixing The 1.0.4 “No SD Card” Error
The 1.0.4 “no SD card” issue confuses a lot of first-time owners because the device can already have internal firmware while still refusing to read the card you prepared. In most cases, the problem is not the handheld, it is the card format, partition layout, or firmware file placement.
Work through these checks in order:
- Confirm the SD card is FAT32 with a 32KB allocation size.
- Confirm the firmware
.awimgfile is sitting in the root of the card. - Confirm the file extension has not been hidden or duplicated.
- Retry the button combo, Volume Down plus Power, for a full 3 to 5 seconds.
- Reformat the card fully if you used a quick format the first time.
- Try a different branded card if the issue keeps repeating.
Some stubborn cards keep old partition data around in a way that makes them look formatted correctly while still acting odd during boot. When I hit a repeat failure here, I stop trying to outsmart the card and swap to a different one, because that usually tells me more in five minutes than another round of guesswork.
No ROMs Visible On Trimui Smart Pro? Here Is The Fix
A blank game list after copying ROMs is one of the most common early problems on the Trimui Smart Pro, and the fix is usually smaller than it feels in the moment. The handheld often needs a manual refresh before it indexes newly added games, so do that before assuming your whole setup is broken.
Run through the basics first:
- Confirm the ROM files are in the correct system folder inside
Roms. - Turn on the device and open the menu.
- Run Refresh ROMs.
- Wait for the scan to finish.
- Recheck the game list.
The faster way to troubleshoot this is to match the symptom to the most likely cause instead of changing random files and hoping for the best.
| Symptom | Likely Cause | Fix |
|---|---|---|
| System folder appears, but game list is empty | ROMs were copied after the last scan | Run Refresh ROMs from the menu |
| Some games show, others do not | Unsupported extension or bad archive structure | Recheck file format, extract once if needed, and remove extra nested folders |
| Nothing appears for one system only | Wrong folder name or wrong capitalization | Match the exact expected system folder name |
| Games show but fail to boot | Missing BIOS or broken cue-file references | Verify BIOS placement and check disc-file naming |
| PS1 or Sega CD library behaves inconsistently | Mixed file formats and messy multi-disc layout | Convert to .chd and keep disc sets clean |
If you still see nothing after a refresh, check folder depth before you blame the device. A common mistake is copying a ROM pack that creates a path like Roms/PS/Best Games Ever/Disc 1/game.chd, which looks organized on a computer and looks invisible to a launcher that expects a simpler path.
CrossMix OS: The Best Community Upgrade For The TSP
CrossMix OS improves the stock Trimui Smart Pro experience without forcing you into a completely different operating system workflow. It layers better defaults, nicer presentation, and more polished emulator behavior onto the setup you already understand.
The smart way to install it is to confirm a normal stock setup first, boot once, and only then add CrossMix OS on top. That order matters, because it separates hardware problems from software tweaks and keeps troubleshooting sane. I always want one clean boot before I start customizing anything, because otherwise every problem starts wearing the same mask.
Installation follows the same general logic as a fresh setup. Flash the firmware, copy the expected files to the card, then place your ROMs and BIOS files in the same structure you would use on stock. CrossMix is especially handy if you want better defaults for PS1 and PSP without spending an evening adjusting settings one by one.
What The Trimui Smart Pro Manual Won’t Tell You
The printed manual covers the hardware basics well enough, but it does not do much to help with the real setup work. It will not walk you through hidden folders, ROM folder naming, Sega CD BIOS quirks, or the difference between a working card and a suspiciously cheap one.
That means the real manual is the setup logic you build for yourself. Once you understand FAT32 formatting, root-level firmware placement, the Roms directory, and the RetroArch system folder, the handheld becomes much less mysterious and much more enjoyable to maintain.
Before You Buy: Hardware Context
If you landed on this guide while still deciding whether the handheld is worth your time, the hardware side matters just as much as the setup side. The Trimui Smart Pro review at Retro Handhelds Online breaks down the screen, controls, performance, battery life, and where the device fits against its closest rivals, which is useful context before you commit to building a larger library around it.
That context also helps explain why people put real effort into getting this device dialed in. The setup can be a little fiddly at first, but the payoff is strong once everything is in place and you are no longer fighting the card, the folders, or the firmware.
Conclusion
A clean Trimui Smart Pro setup comes down to a few things done in the right order: use a reliable FAT32 card, place the firmware file in the root, keep your ROM folders tidy, and drop BIOS files into the proper RetroArch system path. Most of the pain points people hit, especially with Sega CD, the 1.0.4 “no SD card” error, and missing game lists, are small technical misses rather than big failures.
Once those small details are handled, the device becomes refreshingly easy to live with. That is the real payoff of a proper Trimui Smart Pro setup, because you spend less time debugging and more time actually playing the games you meant to load in the first place.