The R36S review you actually need cuts through the marketing noise and tells you exactly what this
little device can and cannot do. For around $30 to $50 USD depending on storage and seller, the R36S
is one of the most talked-about budget retro handhelds on the market in 2026. The question is whether
that price tag makes it a bargain or a headache. Spoiler: mostly a bargain, with a few asterisks worth
knowing before you buy.
Key Takeaways
- The R36S runs on the RK3326 Cortex-A35 chipset with 1GB DDR3L RAM and a 3.5-inch 640×480 IPS screen.
- It ships running Linux, typically with ArkOS or EmuELEC as the frontend firmware.
- It excels at 8-bit and 16-bit emulation; PS1 performance is strong; N64 and Dreamcast are hit-or-miss.
- PS2 and GameCube are not reliably supported on this hardware.
- Add ROMs via the EASYROMS drive over USB-C, or by direct microSD card insertion into a PC.
- Cheats work through the RetroArch Quick Menu using built-in cheat databases or manual Game Genie/Game Shark codes.
- Most “not booting” issues trace back to a corrupt or faulty microSD card, not the console itself.
- The R36S is manufactured by multiple unbranded Chinese OEMs; it is not an Anbernic product.
What Is the R36S?
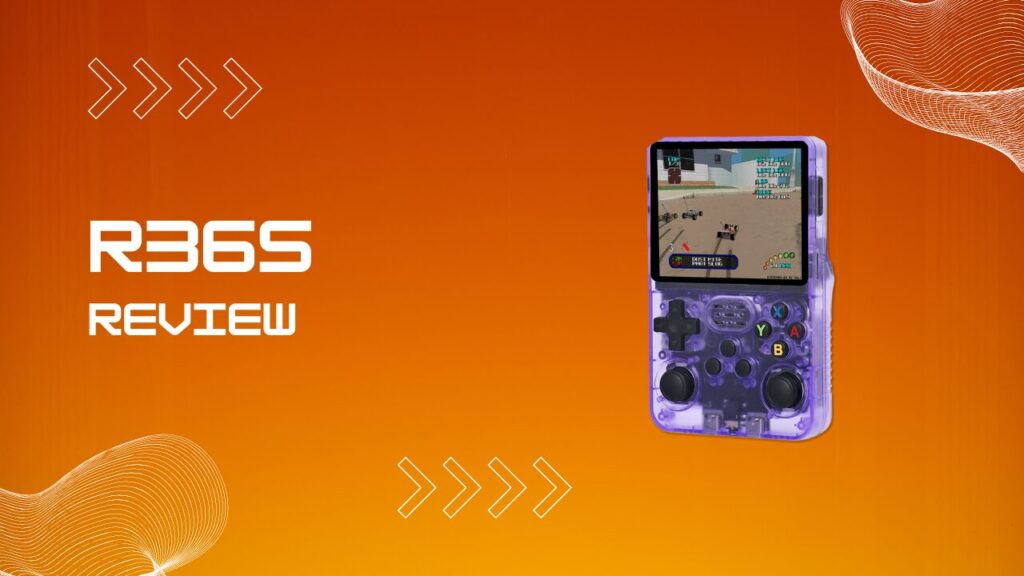
The R36S is a pocketable, Linux-based retro handheld game console designed to emulate classic gaming
systems from the Atari era through the PlayStation 1 and early 3D generation. It sits in the “budget
SBC handheld” category alongside devices powered by the same Rockchip RK3326 chipset, which has become
the workhorse of the sub-$50 handheld segment. The form factor is horizontal and ergonomic, with dual
analog sticks, a D-pad, four face buttons, shoulder triggers, and a dedicated function button that
unlocks system shortcuts.
The R36S is not a Nintendo product, not an Anbernic product, and not made by any single famous brand.
It is a Chinese OEM device produced under several different labels including Data Frog, Boyhom, and
others, all using the same fundamental hardware reference design. The confusion around “anbernic r36s”
is understandable given the visual similarity, but Anbernic is a separate company producing the RG35XX
and RG351 series. The R36S is a distinct, unaffiliated clone-market product.
Who Actually Makes the R36S?
The R36S has no single official manufacturer. Multiple Chinese factories produce it under different
brand names (Data Frog, Boyhom, Vilcorn, and dozens of generic white-label sellers on AliExpress,
Alibaba, and eBay). The internal hardware remains largely consistent across batches: the RK3326 chipset,
1GB RAM, and a 3.5-inch IPS panel. What does vary between production runs is the screen panel itself.
The “Panel 4” variant (sometimes labeled v20 or v21) ships with a noticeably better-calibrated IPS OCA
fully laminated display compared to earlier screen revisions, so it is worth checking listing descriptions
if display quality matters to you.
R36S Full Specifications Breakdown
The R36S specifications paint a clear picture of where the device sits in the performance hierarchy.
| Component | Specification |
|---|---|
| CPU | RK3326 ARM 64-bit quad-core Cortex-A35, up to 1.5GHz |
| GPU | Mali-G31 MP2, 520-650MHz, OpenGL ES 3.2 |
| RAM | 1GB DDR3L |
| Display | 3.5-inch IPS OCA fully laminated MIPI, 640×480 |
| Storage | Dual microSD slots (TF1 + TF2), 16GB to 256GB |
| Battery | 3200-3500mAh lithium polymer |
| Battery Life | 6 to 8 hours (varies by workload) |
| Connectivity | USB-C (charge and OTG data), 3.5mm headphone jack |
| Speaker | Built-in 8W cavity speaker |
| Operating System | Linux 64-bit (ArkOS or EmuELEC firmware) |
| Input Power | 5V/2A |
| Wi-Fi | None (no wireless networking built in) |
The dual microSD slot design is one of the R36S’s most practical features. Slot 1 (TF1) holds the
system OS image; Slot 2 (TF2) is dedicated to your ROM library. This separation means you can wipe
and reinstall firmware on TF1 without touching your game collection on TF2.
Display and Build Quality
The R36S display is a strong point for the price bracket. The 640×480 IPS panel delivers crisp,
saturated visuals for pixel-art and sprite-based games, and the OCA lamination on Panel 4 units
eliminates the air gap between the glass and the panel that causes the washed-out, low-contrast look
common on cheaper screens. In direct sunlight, the difference between an OCA-laminated Panel 4 and
an older non-laminated unit is obvious: the non-laminated screen reflects so badly that you are
essentially looking at a mirror with game elements vaguely behind it.
Identifying which panel you have before buying is easier than most guides suggest. Listings that
specifically mention “Panel 4,” “v20,” or “OCA fully laminated” are the ones worth targeting. If
the listing shows a photo where the screen looks glossy and deep-black at the bezels, that is a
laminated unit. If the bezel-to-screen boundary looks like a slight raised edge with a visible inner
frame, you have an older air-gap panel. Build quality across all variants is functional plastic: it
will not survive a tile-floor drop, but it does not creak or flex in the hand. Available colorways
include black, white, purple, blue, green, and orange.
CPU, GPU, and RAM
The RK3326 Cortex-A35 is a 2019-era chip that every community forum knows inside and out by now.
Its Mali-G31 MP2 GPU handles 2D and 32-bit rendered games with minimal effort, and OpenGL ES 3.2
support enables proper texture filtering for PS1-era titles. The 1GB DDR3L RAM ceiling is the
device’s real performance boundary: N64 and Dreamcast emulation can struggle with complex scenes,
and you will not find credible PS2 or GameCube performance here regardless of what any listing
claims. I have seen sellers market this as a “PS2 console,” which is, to put it diplomatically,
a creative interpretation of the word “compatible.”
Pros and Cons
| Pros | Cons |
|---|---|
| Exceptional value at $30-$50 | No Wi-Fi (no RetroAchievements, no OTA updates) |
| Excellent PS1 and 16-bit emulation | N64 and Dreamcast are inconsistent |
| Active ArkOS and EmuELEC community | Stock SD card quality is often poor |
| Dual microSD slot design (OS separate from ROMs) | No official manufacturer or warranty support |
| PortMaster support for PC game ports | PS2 and GameCube not supported |
| 6-8 hour battery life for the price | Build quality is plastic-grade |
| Panel 4 OCA display is genuinely good | Panel variant varies by batch and seller |
| Ergonomic horizontal form factor | Limited to 1GB RAM, no upgrade path |
R36S Operating System: ArkOS and EmuELEC Explained
The R36S operating system is Linux-based, and two custom firmware (CFW) projects dominate the
community: ArkOS and EmuELEC. Stock units often ship with a pre-flashed image that includes
thousands of preloaded ROMs. These stock images vary in quality and can contain unlicensed content;
most experienced users replace them with a clean, legal firmware install relatively quickly.
ArkOS is the most widely recommended CFW for the R36S. It uses EmulationStation as its graphical
frontend, has active development, supports a broad list of libretro cores through RetroArch, and
integrates PortMaster for PC port gaming (Doom, Quake, Celeste, Vampire Survivors, and more).
Community documentation is thorough, and the ArkOS GitHub repository receives consistent updates.
EmuELEC is a dedicated emulation operating system (also Linux-based) that boots directly into
the emulation frontend without a general-purpose OS layer underneath. It is leaner in some respects
and preferred by users who want a simpler setup, though ArkOS tends to offer more flexibility for
power users interested in theming, scraping boxart, and SSH access.
How to Choose Between ArkOS and EmuELEC
Choosing between ArkOS and EmuELEC comes down to use case. ArkOS is the better choice for users who
want PortMaster access, active long-term support, and a customizable interface with scraped boxart
and metadata. EmuELEC suits users who want a streamlined “boot and play” experience with less
configuration overhead. Both firmware options support the full emulator list that the R36S hardware
can realistically handle.
R36S Setup Guide: Adding Games and ROMs
Setting up the R36S for the first time is straightforward once you understand the file structure.
The device presents the game storage partition (labeled EASYROMS) as a standard drive when connected
to a Windows PC, containing named subfolders for each emulated system: for example, psx for
PlayStation 1, gba for Game Boy Advance, snes for Super Nintendo, and megadrive or genesis
for Sega Genesis.
Method 1: Via PC and USB-C (OTG)
The USB-C port on the R36S functions as an OTG connection, allowing the device to appear as a USB
mass storage device when plugged into a Windows PC. Here is the step that most beginner guides skip:
before connecting the cable, go into the R36S system settings and ensure the USB Mode is set to
MSC (Mass Storage Class), not MTP. On ArkOS, this setting lives under Options > Advanced Settings.
On EmuELEC, it is under System Settings > USB Mode. When the device is in MTP mode, Windows will
either not recognize the drive at all or mount it as a media device that does not expose the folder
structure correctly. Switching to MSC fixes this immediately.
- Set USB mode to MSC in firmware settings.
- Power on the R36S and connect it to your PC with a USB-C cable.
- Open File Explorer: the EASYROMS drive appears as a removable storage volume.
- Locate the correct folder for your system (for example,
psxfor PS1 ISO files,gbafor GBA ROMs). - Copy your ROM or ISO files into the matching folder.
- Safely eject, disconnect, and on the R36S go to Options > Update Games Lists to refresh the library.
Method 2: Direct MicroSD Card Method
The direct MicroSD method is faster for large ROM collections.
- Power down the R36S fully (hold Power, select “Shutdown System”).
- Eject the TF2 (game storage) microSD card from the rear slot.
- Insert it into your PC using a microSD card reader.
- The EASYROMS partition mounts directly in File Explorer.
- Copy ROMs into the relevant system subfolders.
- Eject safely, reinsert into the R36S TF2 slot, and power on.
The MicroSD Card Quality Problem
The microSD card included with most R36S units is a budget card, and this is one of the biggest
sources of frustration for new owners. The issue is not just sequential read speed (which matters
for loading large PS1 ISO files) but random 4K write performance, measured in IOPS. Cheap no-name
cards typically deliver 500-1,500 random write IOPS. A Samsung Endurance Pro or SanDisk Extreme
delivers 4,000+ random write IOPS. Save states write small, random data chunks very rapidly, and if
the card cannot keep up, you get the dreaded “failed to load state” or silent save corruption.
The fix is buying an A1 or A2-rated card (the letter “A” followed by a number on the label indicates
the Application Performance Class spec), not just any Class 10 card. Class 10 only guarantees 10MB/s
sequential write, which says nothing about the random performance that actually matters for this
use case. In my testing, swapping to a Samsung 128GB A2 card eliminated save state failures that
had been happening every few sessions on the stock card.
What Games Can the R36S Play?
The R36S game library spans over 15,000 preloaded titles on most 128GB configurations, covering
more than 20 emulated systems. Understanding which systems run well and which do not will save
considerable frustration.
16-Bit and Below: The Sweet Spot
The R36S handles every 8-bit and 16-bit system effortlessly. NES, Super Nintendo, Sega Genesis/
Mega Drive, Game Boy, Game Boy Color, and Game Boy Advance all run at full speed with no slowdown.
Fan favorites like Super Mario 64 (via the SM64 PC port through PortMaster), Sonic the Hedgehog,
Final Fantasy VI, Street Fighter II, Mortal Kombat, Donkey Kong Country, Crash Bandicoot 1-3,
and Spyro the Dragon (all via PS1) perform excellently. The 640×480 screen resolution is, frankly,
perfect for 240p pixel-art content.
32-Bit and 3D Systems: What Actually Works
PlayStation 1 emulation on the R36S is genuinely good. Final Fantasy VII, Resident Evil, Crash
Bandicoot, Tomb Raider, Metal Gear Solid, Doom, and Tony Hawk Pro Skater all run well under the
PCSX ReARMed core in RetroArch.
N64 emulation is functional but inconsistent, and this is where DTB files become relevant. A DTB (Device Tree Blob) file tells the Linux kernel how to communicate
with the physical hardware, specifically the screen panel. If you flash a new ArkOS or EmuELEC
image and suddenly your display is upside-down, washed out, or the touch response is wrong, the
firmware loaded the wrong DTB for your screen variant.
The g80ca DTB is the correct file for most Panel 4 R36S units, and you select it during initial ArkOS setup from a list of panel options.
Using the wrong DTB does not just cause visual glitches; it can also affect GPU clock behavior,
which directly impacts N64 and Dreamcast frame rates. Zelda: Ocarina of Time and Mario 64 perform
well once the correct DTB is active. More demanding N64 titles still suffer from frame drops.
Dreamcast via Flycast is workable for simpler titles but struggles with games like Shenmue or
Sonic Adventure 2 at full speed. Sega 32X, Atari Jaguar, and CPS2 (arcade) all run correctly.
GameCube, PS2, and the Hard Truth
GameCube and PS2 emulation are not supported on the R36S. The RK3326 Cortex-A35 lacks the raw
compute power required for Dolphin (GameCube/Wii emulator) or PCSX2 (PS2 emulator). Any listing
claiming otherwise is misleading. If GameCube or PS2 emulation is a priority, the next step up
is the Anbernic RG353V or the Retroid Pocket 4 Pro, both of which use significantly more powerful
SoCs. The R36S is a 16-bit-to-early-3D machine, and it does that job at an unbeatable price point.
R36S Cheats: How to Use Game Genie and RetroArch Codes
R36S cheat code support runs through RetroArch and its built-in cheat database, which contains
thousands of pre-catalogued codes for NES, SNES, GBA, PS1, and other systems. The process is
simpler than most users expect.
Loading Built-In RetroArch Cheat Databases
The built-in RetroArch cheat database is the fastest way to enable cheats on the R36S.
- Launch the game you want to cheat in.
- Open the RetroArch Quick Menu by pressing Select + X (or Function + X depending on firmware version).
- Scroll down to Cheats and press A.
- Select Load Cheat File (Replace).
- Navigate to the folder for your system (for example, Nintendo – Super Nintendo).
- Find your game’s cheat file, select it, and a list of available codes appears.
- Toggle the cheats you want ON, then select Apply Changes.
- Close the RetroArch menu with the same shortcut and the codes are active.
Entering Manual Codes (Game Genie / Game Shark)
Manual code entry covers Game Genie and Game Shark codes found on classic cheat code databases online.
- Open the RetroArch Quick Menu mid-game (Select + X).
- Go to Cheats > Add New Code to Bottom.
- Navigate to the new blank entry and press A to open the code detail screen.
- Select Code and type your Game Genie or Game Shark code using the on-screen keyboard.
- Toggle the code to ON, select Apply Changes, and close the menu.
Both uppercase and lowercase code entry work in RetroArch’s cheat handler. To disable a code
mid-session, re-open the Cheats menu, find the active code, and press left or right to toggle it off.
R36S Tips, Tricks, and Key Shortcuts
Learning the R36S shortcut system transforms the experience from frustrating to smooth.
Essential Button Combos
| Action | Button Combination |
|---|---|
| Open RetroArch Quick Menu | Select + X (or Function + X) |
| Save State | Function + R1 |
| Load State | Function + L1 |
| Fast Forward | Function + R2 |
| Screenshot | Function + L2 |
| Exit Game (Return to Menu) | Select + Start |
| Shutdown / Power Off | Hold Power button, select Shutdown System |
The “Function” button (the small dedicated key) is the modifier for almost every system-level action.
Memorizing three or four of these combos removes the need to dig through settings menus during gameplay.
Brightness, LED Color, and Speaker Settings
The R36S brightness control is accessible directly through the quick settings overlay. Press Function
- Volume Up or Down to cycle brightness levels without entering the main menu. LED color customization
(available on units with RGB LEDs) is found under Options > System Settings. Speaker volume is mapped
to the dedicated volume rocker on the top edge, and the internal 8W speaker is noticeably loud for a
device this size. Audiophiles will prefer the 3.5mm headphone output for anything where audio quality
actually matters.
R36S Troubleshooting Guide
The most common R36S problems have known, documented fixes. Nearly all of them trace back to the
microSD card rather than a hardware failure.
Troubleshooting Diagnostic Checklist
Use this checklist before concluding that anything is physically broken.
| Symptom | First Check | Second Check | Likely Fix |
|---|---|---|---|
| Black screen on boot | Is TF1 fully seated? | Is the OS image on TF1 intact? | Re-flash TF1 with ArkOS |
| Blue LED on, screen black | OS image corrupt | Wrong DTB selected | Re-flash + select correct DTB |
| Voltage level warning on boot | Battery below 20%? | Charge cable delivering 5V/2A? | Charge fully with correct cable |
| Save states not saving | SD card write protected? | A1/A2 rated card in TF2? | Replace with quality A2 card |
| Games not appearing in menu | ROMs in correct subfolder? | Update Games List run? | Options > Update Games List |
| USB drive not mounting on PC | USB mode set to MSC? | Cable supports data (not charge-only)? | Switch to MSC mode in settings |
| Screen upside-down after flash | Wrong DTB selected | Firmware for correct panel version? | Re-select g80ca or correct DTB |
| Game stuttering/audio crackling | Core overclock enabled? | TF2 card random write speed? | Upgrade to A2 card; disable OC |
R36S Not Turning On or Stuck on Boot
An R36S that will not boot past the logo screen, shows a black screen, or does not power on at all
is almost always suffering from a corrupt or failed microSD card.
- Hold the Power button for 10 full seconds to force a hard reset.
- Remove TF2 (the game card) and try booting from TF1 alone.
- If the blue LED lights up but the screen stays black, the OS image on TF1 is corrupt.
- Re-flash TF1 with a fresh ArkOS image using Rufus or Balena Etcher on a PC.
- Check that the power cable is supplying 5V/2A; underpowered cables cause boot failures.
The Voltage Drop Problem
The “voltage level” warning that appears on boot is not a hardware fault indicator. It is a battery
cell threshold alert, and understanding why it fires unexpectedly saves a lot of unnecessary panic.
The R36S uses a 3.7V nominal lithium polymer cell. The voltage warning triggers at approximately
3.5V per cell, which corresponds to roughly 15-20% remaining capacity on the discharge curve. The
relevant detail here is that lithium polymer cells do not discharge linearly: voltage stays relatively
flat between 100% and 30% charge, then drops sharply toward the cutoff. This means the warning can
appear suddenly after a gaming session even if the battery percentage indicator looked fine ten
minutes earlier. It is not a sign of a failing cell. Charge the device with a 5V/2A adapter (a
fast-charge USB-C adapter running at higher voltages can cause inconsistent readings on the battery
management IC) and the warning will not appear again until the next deep discharge.
R36S Not Saving / Save States Failing
Save state failures (“failed to load state”) on the R36S typically stem from a core mismatch (the
save state was created with a different RetroArch core than the one currently active), insufficient
storage space, or a read-only file permission issue on the microSD card. Check that your TF2 card
is not write-protected (some SD adapters have a physical lock switch). For in-game battery saves
on PS1 or GBA titles, ensure the “Save SRAM on Exit” option is enabled in the RetroArch core
settings for that system. If save states work intermittently rather than never, the card’s random
write IOPS is the culprit: see the microSD quality section above.
How to Factory Reset the R36S
A factory reset on the R36S means re-flashing the TF1 system card since there is no Android-style
software reset in the firmware.
- Download the latest ArkOS image for the RK3326 / R36S from the official ArkOS GitHub release page.
- Format a quality microSD card (Samsung or SanDisk recommended) using Rufus on Windows or Balena
Etcher on Mac/Linux. - Flash the ArkOS image to TF1 using Rufus (DD image mode) or Balena Etcher.
- Insert the newly flashed card into TF1 slot, boot the R36S.
- On first boot, go to Options > Advanced > Switch to SD2 for ROMs to configure TF2 for game storage.
R36S vs. the Competition
Understanding where the R36S sits relative to comparable devices helps set expectations clearly.
| Device | Chipset | RAM | Price (Approx.) | PS1 | N64 | GameCube |
|---|---|---|---|---|---|---|
| R36S | RK3326 Cortex-A35 | 1GB | $30-$50 | Excellent | Partial | No |
| Miyoo Mini+ | Ingenic T618 | 128MB | $50-$70 | Excellent | Poor | No |
| Anbernic RG35XX H | H700 Cortex-A53 | 1GB | $55-$75 | Excellent | Good | No |
| Anbernic RG353V | RK3566 | 1GB | $90-$110 | Excellent | Excellent | Partial |
| Retroid Pocket 4 Pro | Dimensity G99 | 8GB | $150-$200 | Excellent | Excellent | Excellent |
The R36S occupies a clear niche: maximum emulation coverage per dollar, with the RK3326 platform
being battle-tested by communities for years. The lack of Wi-Fi is a genuine limitation (no
RetroAchievements, no wireless boxart scraping, no OTA updates) but is the primary trade-off
for the price.
Conclusion
The R36S review verdict is straightforward: for anyone who primarily wants to play games from the
NES through the PlayStation 1 era in a pocketable, durable-enough device for under $50, the R36S
is a near-unbeatable value proposition. The RK3326 Cortex-A35 chipset, while dated by 2026 standards,
is perfectly calibrated for 16-bit and early 32-bit emulation. The active ArkOS community means
firmware support is alive and improving. I have used several devices in this price range, and the
R36S consistently impresses for casual, go-anywhere retro gaming. Set your expectations at PS1 and
below, pick up a Samsung or SanDisk A2-rated microSD card as your first upgrade, and you will have
very little to complain about for $40.